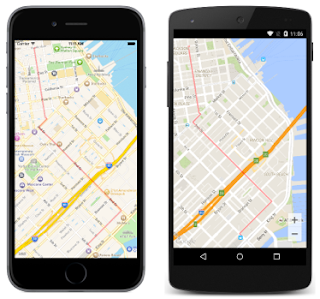
The use of maps in mobile applications is undeniably vast which brings customization regarding maps very essential for various needs. Keeping this in Mind we bring you a procedure to draw over a map, by drawing here, we emphasize on two basic shapes i.e. polyline and circle, those which possess the largest use when highlighting when in maps.
We are going to proceed with this using a Renderer approach. This is done by making a schema of the properties of control which possesses all properties of that custom control(here, a map), After that, we make platform-specific renderer to improve the custom control as per the platform.
This grants us an ease, as we call the methods from the interface and use the code written in the native projects.This allows apps to call into platform-specific functionality from shared code. This functionality enables Xamarin.Forms apps to achieve anything that a native app can do.
Step-1 Make the structure of the control in the shared project.
This will help us access the custom map in our shared project and also, it will link up with its renderers in the native projects.
public class CustomMap: Map
    {
        public List<Position> RouteCoordinates { get; set; }
        public CustomCircle Circle { get; set; }


        public CustomMap()
        {
            RouteCoordinates = new List<Position>();
        }
    }
}
Here, CustomCircle is another class which we have created that contains two properties as "Radius" and "Position".
public class CustomCircle
    {
        public Position Position { get; set; }
        public double Radius { get; set; }
    }
Step-2(Android) Make the custom renderers for Custom Map in native projects.
public class CustomMapRenderer : MapRenderer, IOnMapReadyCallback
    {
        bool isLoaded = false;
        GoogleMap map;
        List<Position> routeCoordinates;
        CustomCircle circle;


        protected override void OnElementChanged(ElementChangedEventArgs<Map> e)
        {
            base.OnElementChanged(e);
            if (e.OldElement != null)
            {
                // Unsubscribe
            }

            if (e.NewElement != null)
            {
                var formsMap = (CustomMap)e.NewElement;
                routeCoordinates = formsMap.RouteCoordinates;
                circle = formsMap.Circle;
            }
        }


        public void OnMapReady(GoogleMap googleMap)
        {
            map = googleMap;

                var polylineOptions = new PolylineOptions();
                polylineOptions.InvokeColor(0x66FF0000);

                foreach (var position in routeCoordinates)
                    polylineOptions.Add(new LatLng(position.Latitude, position.Longitude));

                map.AddPolyline(polylineOptions);

                var circleOptions = new CircleOptions();
                circleOptions.InvokeCenter(new LatLng(circle.Position.Latitude, circle.Position.Longitude));
                circleOptions.InvokeRadius(circle.Radius);
                circleOptions.InvokeFillColor(0X00FFFFFF);
                circleOptions.InvokeStrokeColor(0X66FF0000);
                circleOptions.InvokeStrokeWidth(3);
                map.AddCircle(circleOptions);

        }

    }
This code will make a polyline and a circle together, you can customise it according to need by separating the polyline and circle code from one another.
Polyline option deals with everything related to making the polyline. Circle option is to deal with making a circular area.
Note: Always remember to add the Dependency while creating a renderer. This is done above the namespace declaration.
like this:
[assembly: ExportRenderer(typeof(CustomMap), typeof(CustomMapRenderer))]
This is done with both Android and iOS. This step links the renderer with the custom control created in the shared projects. So whenever that custom control is called, this renderer will call itself depending on the platform.
Step-3(iOS) Make the custom renderers for Custom Map in native projects.
public class ExtendedMapRenderer : MapRenderer
{
        ExtendedMap element;
        MKMapView nativeMap;

        MKCircleRenderer circleRenderer;
        MKPolylineRenderer polylineRenderer;
        bool isCircle;

        protected override void OnElementChanged(ElementChangedEventArgs<View> e)
        {
            base.OnElementChanged(e);

            if (e.NewElement == null)
                return;
            if (e.OldElement != null)
            {
                nativeMap = Control as MKMapView;
                nativeMap.OverlayRenderer = null;
            }
            element = Element as ExtendedMap;
            nativeMap = Control as MKMapView;
            //}

            var formsMap = (ExtendedMap)e.NewElement;
                element.SetNativeContext(this);

                nativeMap.OverlayRenderer = GetOverlayPolygon;

                    CLLocationCoordinate2D[] coords = new CLLocationCoordinate2D[element.RouteCoordinates.Count];

                    int index = 0;
                    foreach (var position in element.RouteCoordinates)
                    {
                        coords[index] = new CLLocationCoordinate2D(position.Latitude, position.Longitude);
                        index++;
                    }

                    var routeOverlay = MKPolyline.FromCoordinates(coords);
                    nativeMap.AddOverlay(routeOverlay);

                foreach (var circle in element.Circles)
                {
                    nativeMap.OverlayRenderer = GetOverlayCircle;
                    var circleOverlay = MKCircle.Circle(new CLLocationCoordinate2D(circle.Position.Latitude, circle.Position.Longitude), circle.Radius);
                    nativeMap.AddOverlay(circleOverlay);
                }
        }
        MKOverlayRenderer GetOverlayCircle(MKMapView mapView, IMKOverlay overlay)
        {
            if (circleRenderer == null)
            {

                circleRenderer = new MKCircleRenderer(overlay as MKCircle);
                circleRenderer.FillColor = UIColor.Red;
                circleRenderer.Alpha = 0.4f;
            }
                return circleRenderer;

        }

        MKOverlayRenderer GetOverlayPolygon(MKMapView mapView, IMKOverlay overlay)
        {
             if (polylineRenderer == null)
            {

                polylineRenderer = new MKPolylineRenderer(overlay as MKPolyline);
                polylineRenderer.FillColor = UIColor.Blue;
                polylineRenderer.StrokeColor = UIColor.Red;
                polylineRenderer.LineWidth = 3;
                polylineRenderer.Alpha = 0.4f;
            }

            return polylineRenderer;

        }
}
Again, this is a code snippet to draw both circle and a polyline. you can customise it to your needs.